
Foundation & moisture estimator · Updated September 2026
Radon Mitigation Cost Calculator
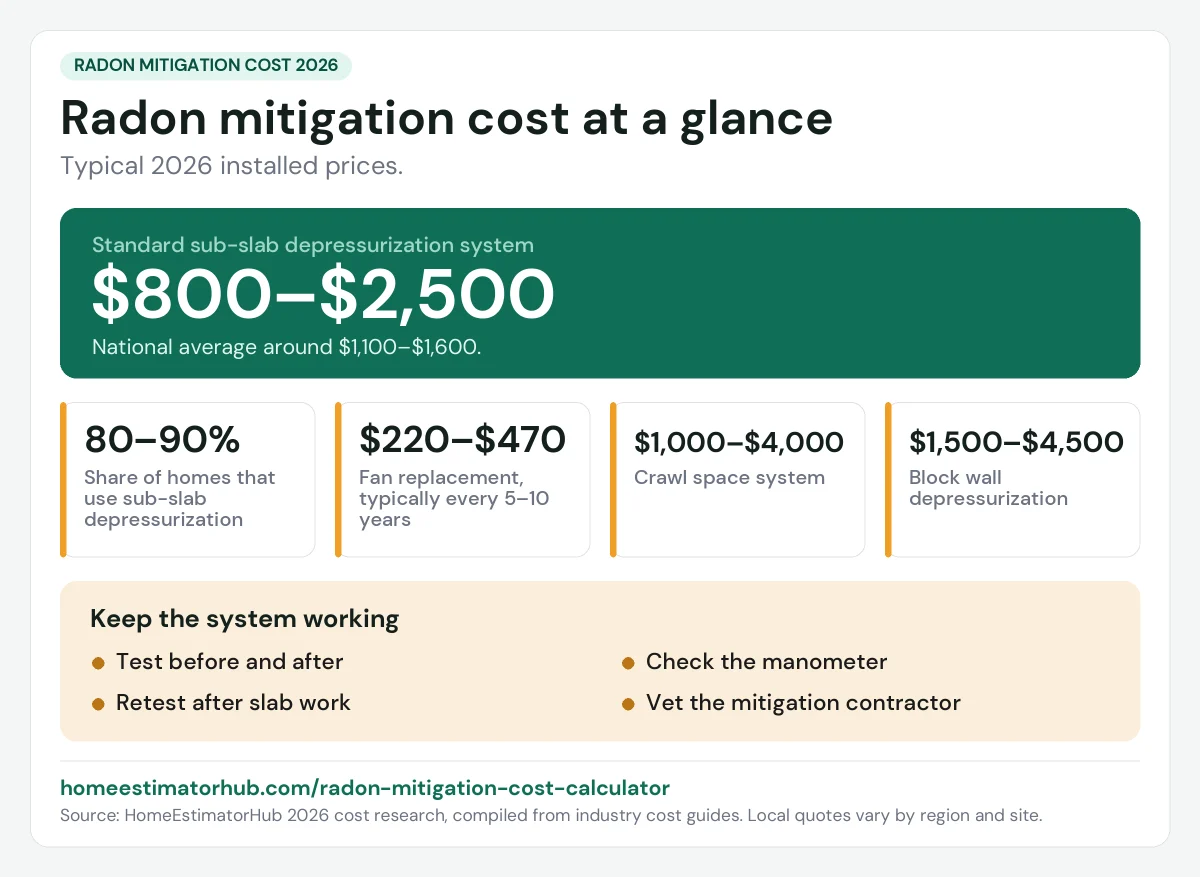
Radon mitigation costs $800 to $2,500 for a standard sub-slab depressurization system — the most common and effective method — with a national average around $1,100 to $1,600. Use our free calculator to get an instant estimate based on your foundation type, home size, and test result.
Enter your radon mitigation details
Enter your home size and test result
Enter both to calculate your instant cost estimate.
- The EPA action level is 4 pCi/L — mitigation is recommended at or above this level
- Sub-slab depressurization reduces radon levels by 80-99% in most homes
- Block wall foundations often need two combined systems for full effectiveness
- Post-mitigation testing confirms the system actually worked
What affects radon mitigation cost?
- Foundation type — Crawl spaces and block wall foundations cost more than a standard basement or slab.
- Home size — Larger homes may need a bigger fan or additional suction points.
- Radon level — Higher readings often require a more powerful system to bring levels down reliably.
- Pipe routing — Exterior routing avoids disrupting a finished basement but adds visible piping.
- Foundation complexity — Split-level homes or additions often need multiple suction points.
- State — Labor costs in California and the Northeast run 20-30% above the national average.

How much does radon mitigation cost in 2026?
Radon mitigation costs $800 to $2,500 for a standard sub-slab depressurization system — the most common method, used in roughly 80-90% of residential installations. The national average lands around $1,100 to $1,600, with a reported median near $1,111 across thousands of residential jobs. Crawl space and block wall systems typically cost more, since they require additional preparation or a fundamentally different approach. Use our calculator above for an instant estimate based on your specific home.
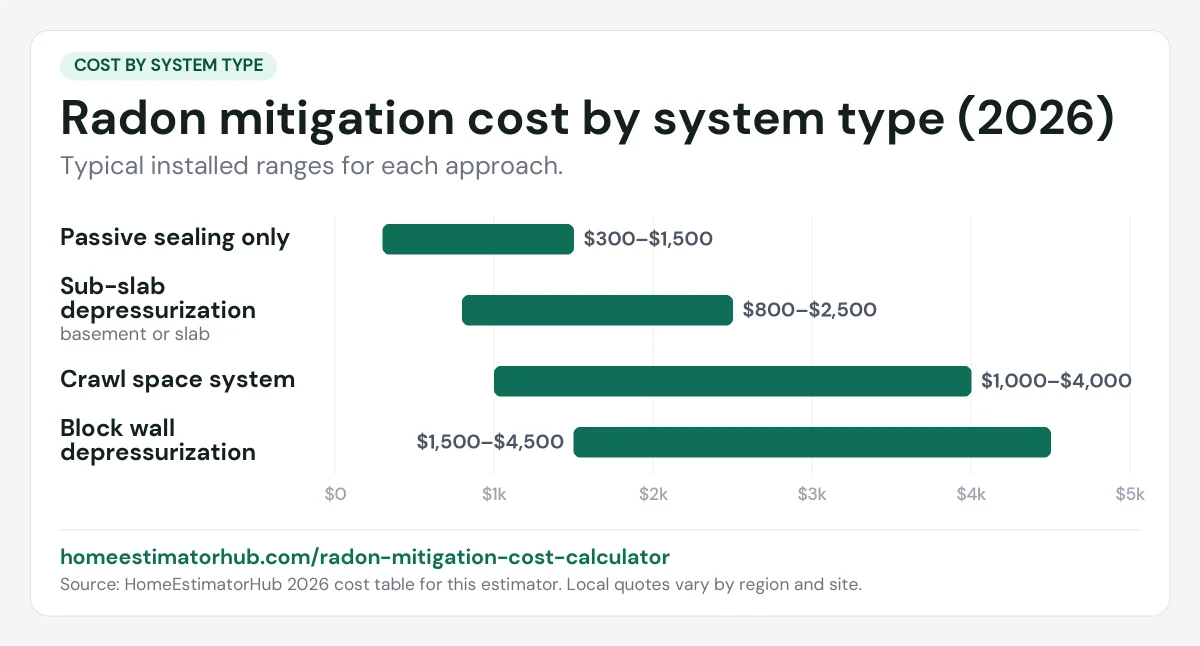
Radon mitigation cost by system type
| System type | Typical cost |
|---|---|
| Sub-slab depressurization (basement/slab) | $800–$2,500 |
| Crawl space system | $1,000–$4,000 |
| Block wall depressurization | $1,500–$4,500 |
| Passive sealing only | $300–$1,500 |
Passive sealing — caulk, polyurethane sealant, and a sealed sump lid, with no fan or electricity — is worth understanding clearly: it's rarely a complete fix for a home already testing above the EPA action level. It's more useful as a pre-mitigation cost-reducer that a following active system builds on, or as a preventive measure during new construction, not a standalone solution for an existing high reading.
The EPA action level — and why "below 4" still deserves a second look
The EPA sets 4 picocuries per liter (pCi/L) as its action level — the point at which mitigation is officially recommended. Worth knowing: there is no established "safe" level of radon exposure, and the World Health Organization's recommended action threshold is actually more conservative, at 2.7 pCi/L. The EPA itself recommends considering mitigation for readings between 2 and 4 pCi/L, even though that's technically below its own action threshold, precisely because risk doesn't have a clean floor. Radon is estimated by the EPA to be the second leading cause of lung cancer in the US after smoking, linked to roughly 21,000 deaths annually — context worth keeping in mind if your test result sits in that "technically below 4, but not really zero" range.
How sub-slab depressurization actually works
The process is more straightforward than it sounds. A technician drills a 4 to 6 inch hole through the foundation slab into the soil beneath it — this becomes the suction point. A 3 to 4 inch PVC pipe runs from that point up through the home (commonly routed through a garage or utility space) and vents above the roofline, typically at least 12 inches above the roof edge. A continuously running fan, using about 30 to 50 watts of electricity — roughly $30 to $50 a year to operate — pulls radon-laden air from beneath the foundation and exhausts it safely outside before it can enter the living space. Most properly installed systems reduce radon levels by 80% to 99%.
Why block-wall homes often need two systems, not one
This is a detail worth knowing if your home has a hollow concrete block foundation. Radon can enter through the soil beneath the slab and separately through the hollow cavities inside the block walls themselves — two different entry pathways. Using only sub-slab depressurization on a block-wall home can leave 30% to 40% of radon sources unaddressed, since it doesn't reach the gas moving through the block cavities. That's why block-wall foundations are often paired with a dedicated block wall depressurization system alongside standard sub-slab suction, rather than relying on one method alone.
Is DIY radon mitigation a good idea?
This deserves more caution than most DIY home projects, for a specific reason: a radon system that isn't working correctly is invisible. Unlike a deck that visibly sags or a leak you can see, a radon system with an undersized fan or a poorly sealed pipe gives no obvious sign of failure — the only way to know is testing, and by then you may have been living with elevated radon for months. DIY materials run roughly $350 to $900 (fan, PVC piping, core bit rental, test kits), but the process genuinely requires expertise in slab drilling, pipe routing, roof penetration, and electrical safety, and many DIY systems fail post-installation testing due to improper fan sizing or pipe sealing issues. Given that the entire point of the system is verified performance, not appearance, this is a project where professional installation with mandatory post-testing is worth the difference in cost.
What to look for in a mitigation contractor
Look specifically for contractors certified through NRPP (National Radon Proficiency Program) or NRSB (National Radon Safety Board) — these are the standard credentialing bodies for radon mitigation work in the US. Whoever you hire, request post-mitigation retesting ($40 to $150) before making final payment. A reputable contractor should welcome this, since it's the only real proof the system is doing its job. If your radon issue is tied to a crawl space with broader moisture problems, our crawl space encapsulation cost calculator covers the vapor barrier and sealing work that often overlaps with radon mitigation prep.
Testing properly, before and after
Every decision here rests on a number, so the number needs to be good. Radon fluctuates with weather, season and how the house is being used, which is why test conditions matter as much as the test itself.
- Short-term tests run a few days and give a fast snapshot. They are the standard screening tool and the usual choice during a property transaction.
- Long-term tests run for months and give a far better picture of your actual year-round exposure, because they average across the seasonal swings.
- Closed-house conditions. Windows and exterior doors stay closed apart from normal entry and exit, generally starting before the test and continuing throughout. A test run with windows open measures the weather, not the house.
- Placement. The detector goes in the lowest lived-in level, away from drafts, exterior walls, and areas of high humidity.
Afterward, a post-mitigation retest is not a formality — it is the only proof the system works. It typically costs $100 to $200, and it should be part of the contract rather than something you arrange separately. A properly designed sub-slab system commonly reduces levels by 90% or more, with homes often moving from around 8 to 10 pCi/L down to something in the region of 0.5 to 2 pCi/L against the EPA action level of 4.0.
What owning the system involves
Installed systems for a typical single-family home generally run $800 to $2,500, with many standard installations landing near $1,200 to $1,800 and more involved sub-slab work with fan, electrical and post-testing quoted higher. After that, a mitigation system is close to maintenance-free — but not entirely:
| Item | What to expect |
|---|---|
| The fan | The only moving part. Typically lasts around 5 to 10 years; replacement commonly $220–$470 |
| Electricity | The fan runs continuously by design — a small but permanent load |
| The manometer | The U-shaped gauge on the pipe. Uneven liquid levels mean the fan is working; level means it has stopped |
| Retesting | Periodically, and after any work that disturbs the slab or changes the building envelope |
Get in the habit of glancing at the manometer. A failed fan is silent and invisible otherwise, and the system reverts to doing nothing without announcing it.
What undermines a working system
Sub-slab depressurization works by holding the area beneath the slab at slightly lower pressure than the house, so soil gas is drawn out through the pipe rather than up through the floor. Anything that lets the system pull house air instead of soil gas reduces how well it performs:
- An uncovered or poorly sealed sump pit — one of the largest openings into the sub-slab area in most basements. A sealed lid is standard practice.
- Unsealed floor cracks, control joints and the perimeter gap where the slab meets the wall.
- Dry floor drain traps. A trap that has evaporated is an open pipe to the ground. Pour water down unused drains periodically.
- Openings around service penetrations through the slab.
Sealing these is inexpensive and improves system performance, but sealing on its own is not a mitigation strategy — it supports the fan rather than replacing it.
Two practical notes. First, any work that changes how air moves in the lower part of the house can affect radon levels, so retest after encapsulating a crawl space or finishing a basement — see our crawl space encapsulation calculator and basement finishing cost estimator. Second, in a property sale, keep the installation documentation and the post-mitigation test result together. Buyers ask, and a documented system with a verified result is an asset rather than a red flag.
Frequently asked questions
What is the EPA action level for radon?
4 picocuries per liter (pCi/L). The EPA recommends mitigation at or above this level and recommends considering it between 2 and 4 pCi/L as well, since there's no established completely safe level of radon exposure.
How much does a radon mitigation system cost?
$800 to $2,500 for a standard sub-slab depressurization system, with a national average around $1,100 to $1,600. Crawl space and block wall systems typically cost more due to additional preparation or a different mitigation approach.
Does radon mitigation actually work?
Yes. Properly installed sub-slab depressurization systems reduce radon levels by 80% to 99% in most homes. Post-mitigation testing is used to confirm the specific reduction achieved in your home.
Is it safe to DIY a radon mitigation system?
It's possible but carries real risk, since a poorly installed system shows no visible signs of failure — only testing reveals whether it's working. Many DIY systems fail post-installation testing due to improper fan sizing or pipe sealing.
Sources & standards
Primary references behind the standards, code requirements and safety guidance cited on this page. Cost ranges shown here are HomeEstimatorHub estimates, not contractor quotes — see how these are calculated, and always confirm against written bids and your local building department.
More free estimators
Explore more home cost estimators
Free cost estimators for every home improvement project — updated for 2026, no signup required.
Disclaimer: All radon mitigation cost estimates are for informational purposes only based on average 2026 US contractor rates. This is not medical or health advice. Radon testing and mitigation decisions should be based on your specific test results and, if needed, a certified radon professional's assessment. Always confirm your home's radon level with a proper test before deciding whether mitigation is necessary.